


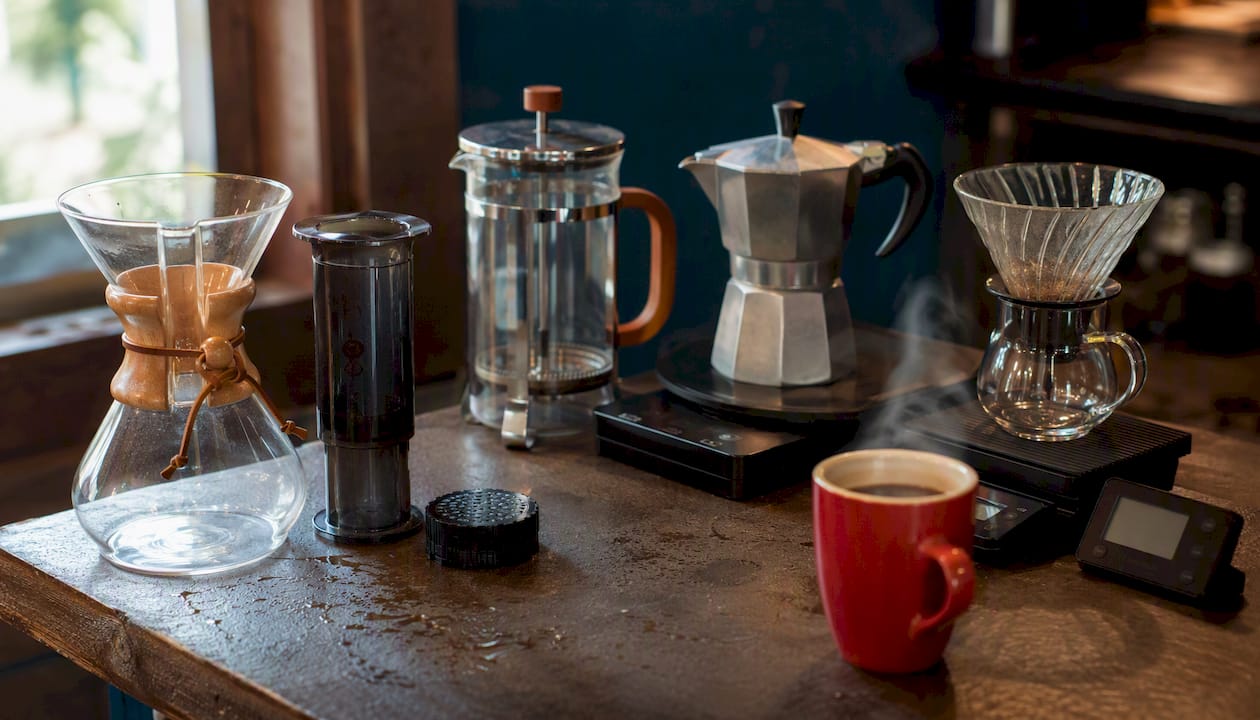
Pour-over gives you the clearest, most origin-true cup. French press delivers body and richness. AeroPress is the most forgiving and portable option you can own. For most enthusiasts starting out, the Hario V60 or AeroPress is the best first buy — both reward attention to technique without demanding expensive equipment. The Specialty Coffee Association recognises water temperature, grind consistency, ratio, and contact time as the four variables that determine cup quality across every method, and Nairobibarschool’s barista trainers build their teaching around exactly those four.
Best for clarity: Pour-over (Hario V60, Chemex)
Best for body and richness: French press (Bodum Chambord)
Best for versatility and travel: AeroPress
Best for convenience, multi-cup: Electric drip (Mylitta-style)
Best for espresso-like intensity: Moka pot (Bialetti) or domestic espresso machine
Best for low-acid, iced coffee: Cold brew
- Short on time, want clean flavour: AeroPress or V60 (under 4 minutes, minimal kit)
- Want full-bodied coffee with no fuss: French press, coarse grind, 4-minute steep
- Feeding a household every morning: Electric drip machine, ideally SCA-certified
- Chasing espresso at home without a £500+ machine: Bialetti moka pot
- Sensitive stomach or love iced coffee: Cold brew concentrate
Key takeaways
The single most effective thing you can do for your home coffee is fix grind consistency, ratio, and temperature before spending money on a new brewer.
| Point | Details |
|---|---|
| Match method to your goal | Pour-over for clarity, French press for body, AeroPress for speed and travel, drip for multi-cup convenience. |
| Four variables beat hardware | Grind size, water temperature, ratio, and contact time determine cup quality more than the brewer itself. |
| Upgrade the grinder first | A burr grinder is the single highest-leverage purchase for consistent home brewing results. |
| Weigh and time every brew | Use a kitchen scale and a timer; changing one variable at a time is the only reliable way to improve. |
| Get hands-on training | A short barista course at Nairobibarschool accelerates improvement faster than trial and error alone. |
Table of Contents
- How do the main coffee brewing methods compare at a glance?
- Pour-over coffee: how to brew a clean, bright cup
- Why is the AeroPress so popular with home brewers?
- French press coffee: full immersion, maximum body
- Electric drip coffee makers: the low-effort everyday option
- Moka pot and home espresso: intense, concentrated brewing at home
- Cold brew and cold drip: smooth, low-acid coffee for iced drinks
- Other brewing methods worth exploring
- How do you choose the right brewing method for your routine?
- What actually makes a good cup? The metrics that matter
- Barista-level technique tips from Nairobibarschool trainers
- Sources
How do the main coffee brewing methods compare at a glance?
The table below covers the seven methods most home brewers will actually use. Coffee preparation methods fall into four broad categories: decoction, infusion, gravitational feed, and pressurised percolation — and each category produces a distinctly different cup.
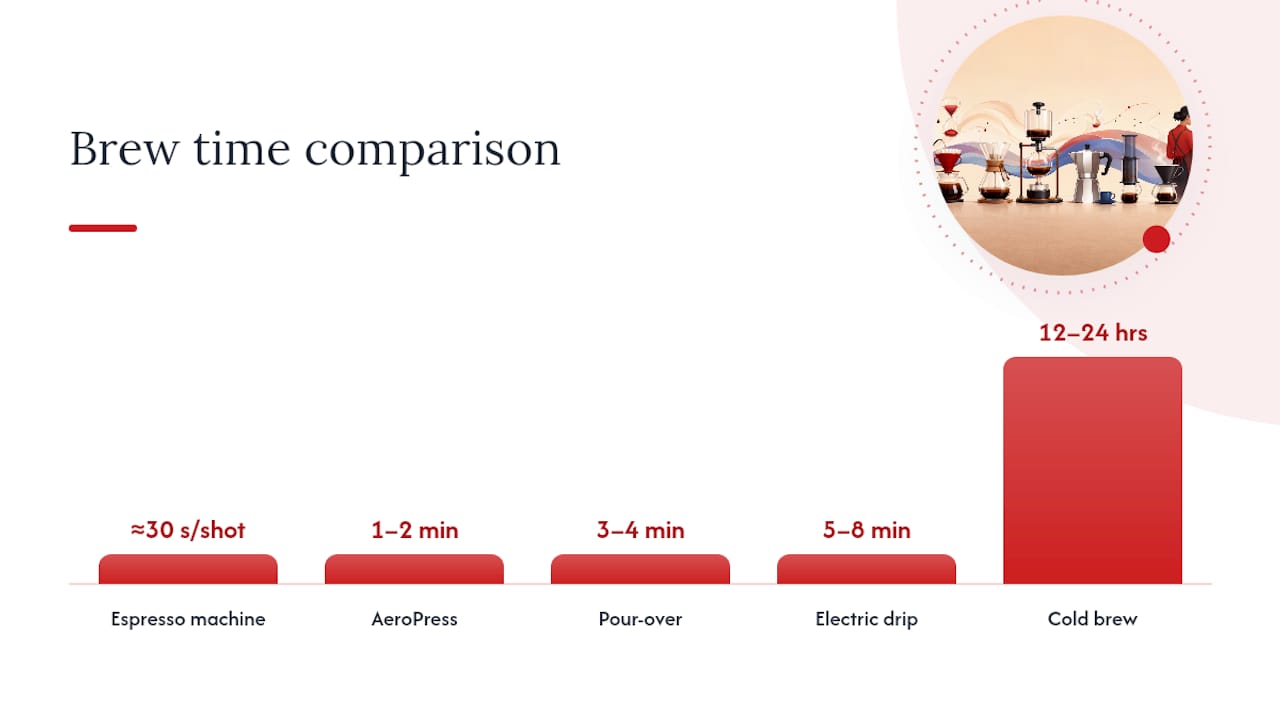
| Method | Best for | Taste profile | Brew time | Ease of use | Cleanup | Capacity | Equipment cost | Grind sensitivity |
|---|---|---|---|---|---|---|---|---|
| Pour-over (V60/Chemex) | Clarity, origin character | Clean, bright, nuanced | 3–4 min | Medium (technique matters) | Easy (paper filter) | Single to 2 cups | £15–£60 | High |
| AeroPress | Versatility, travel, speed | Clean, concentrated, smooth | 1–2 min | Easy | Very easy | 1–2 cups | £30–£40 | Low |
| French press (Bodum Chambord) | Body, richness | Heavy, oily, full | 4 min | Easy | Moderate | 2–8 cups | £20 | Medium |
| Electric drip (Melitta-style) | Convenience, multi-cup | Steady, consistent | 5–8 min | Very easy | Easy | 4–12 cups | £30–£200+ | Low |
| Moka pot (Bialetti) | Intensity, stovetop espresso | Strong, bold, no crema | Several minutes | Medium | Easy | Multiple cups | £20–£40 | Medium-high |
| Domestic espresso machine | Espresso, milk drinks | Intense, concentrated, crema | About half a minute per shot | High | Moderate | 1–2 shots | £150–£800+ | Very high |
| Cold brew | Low acid, iced coffee | Smooth, sweet, mellow | 12–24 hrs | Easy | Easy | Large batch | £10–£30 | Low |
Health note: Paper filters (pour-over, drip, AeroPress) remove most diterpenes — specifically cafestol and kahweol — that are linked to raised LDL cholesterol. French press and moka pot allow these oils into the cup. For most healthy adults this is not a concern, but it is worth knowing if you drink several cups daily.
Pour-over coffee: how to brew a clean, bright cup
Pour-over is a gravitational-feed method: hot water passes through a bed of grounds and a paper filter, and gravity pulls the liquid into a vessel below. The paper traps oils and fine particles, which is precisely why the resulting cup is so clear and flavour-distinct. If you are drinking a single-origin Ethiopian or Kenyan bean, pour-over is the method that lets the origin character speak loudest.
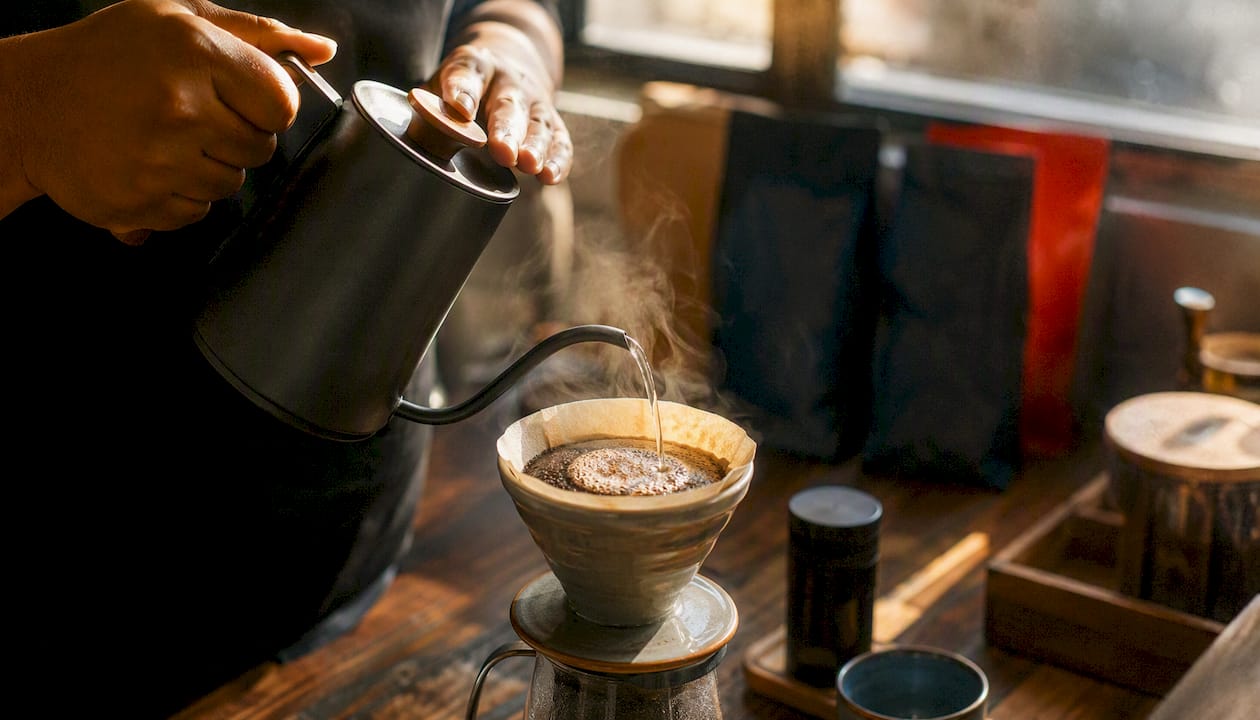
Pour-over typically brews in 3–4 minutes with a medium-fine grind and produces a bright, clean cup with higher perceived acidity than immersion methods. The Hario V60 and Chemex are the two most widely used drippers in the UK. The V60 gives you more control over flow rate through its spiral ribs; the Chemex uses a thicker filter that removes even more oils, producing a slightly lighter, more tea-like result.
Repeatable V60 recipe
- Ratio: 1:16 (e.g. 15 g coffee to 240 ml water)
- Grind: Medium-fine (slightly coarser than table salt)
- Water temperature: 90–96 °C (let boiled water rest 30–45 seconds)
- Bloom: Pour 30 ml of water over the grounds, wait 30 seconds — this releases CO₂ and improves even extraction
- Total pour: Add remaining water in two or three slow, circular pours
- Total brew time: 3 minutes to 3 minutes 30 seconds
Pros:
- Exceptional clarity and flavour nuance
- Paper filter means easy cleanup
- Inexpensive entry point (a V60 costs around £15)
Cons:
- Single-serve only without a large Chemex
- Requires a gooseneck kettle for consistent flow control
- Paper filter cost adds up over time
Pro Tip: Wet the paper filter with hot water before adding grounds. It removes any papery taste and pre-heats the vessel. Pour that rinse water away before brewing.
For cleaning, simply discard the filter and grounds, rinse the dripper, and you are done. The Chemex requires more care around the wooden collar but nothing complicated.
Why is the AeroPress so popular with home brewers?
The AeroPress sits between immersion and pressure brewing. Grounds steep briefly in hot water (immersion), then you press a plunger to force the liquid through a micro-filter (pressure). The result is a clean, concentrated cup that shares characteristics with both pour-over and espresso without the cost or skill demand of either.
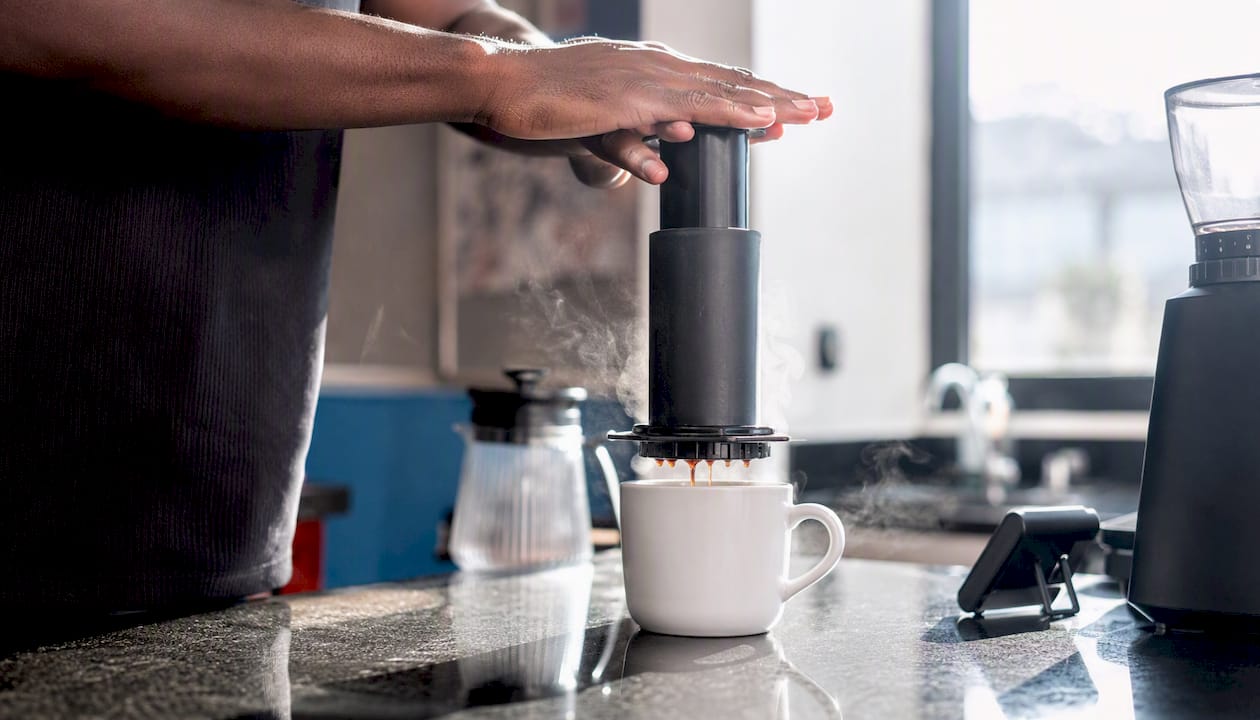
AeroPress is highly forgiving across grind sizes and temperatures and can produce a concentrated cup in under 90 seconds. That tolerance is the real reason it has become a staple for home brewers and travellers alike — a slightly coarser or finer grind will not ruin the cup the way it might on an espresso machine.
Standard AeroPress recipe
- Ratio: 1:12 for a concentrate (17 g coffee to 200 ml water), dilute to taste
- Grind: Medium (similar to sea salt)
- Water temperature: 85–92 °C (slightly cooler than pour-over works well here)
- Contact time: 1 minute steep, then press slowly over 30 seconds
- Total time: Under 2 minutes
The AeroPress produces a smooth, low-bitterness cup with good body. Use it as a concentrate and top with hot water for an Americano-style drink, or with cold water and ice for a quick iced coffee. Cleanup is genuinely fast: pop the puck of grounds into the bin, rinse the rubber seal, done.
AeroPress vs pour-over: Pour-over gives more clarity and origin expression; AeroPress gives more body and speed. AeroPress vs espresso: AeroPress produces a concentrated cup but without true crema or the 9-bar pressure a real espresso machine uses, so the texture differs. For home use, the AeroPress wins on value and versatility — it costs around £30–£40 and fits in a bag.
French press coffee: full immersion, maximum body
A French press (or cafetière, as it is more commonly called in the UK) works on full immersion: grounds steep directly in hot water with no paper filter between them. When you press the plunger, the metal mesh holds back the grounds while the brewed coffee pours out. Because no paper filter is involved, the natural oils and fine particles stay in the cup, giving French press its characteristic heavy body and slightly silky mouthfeel.
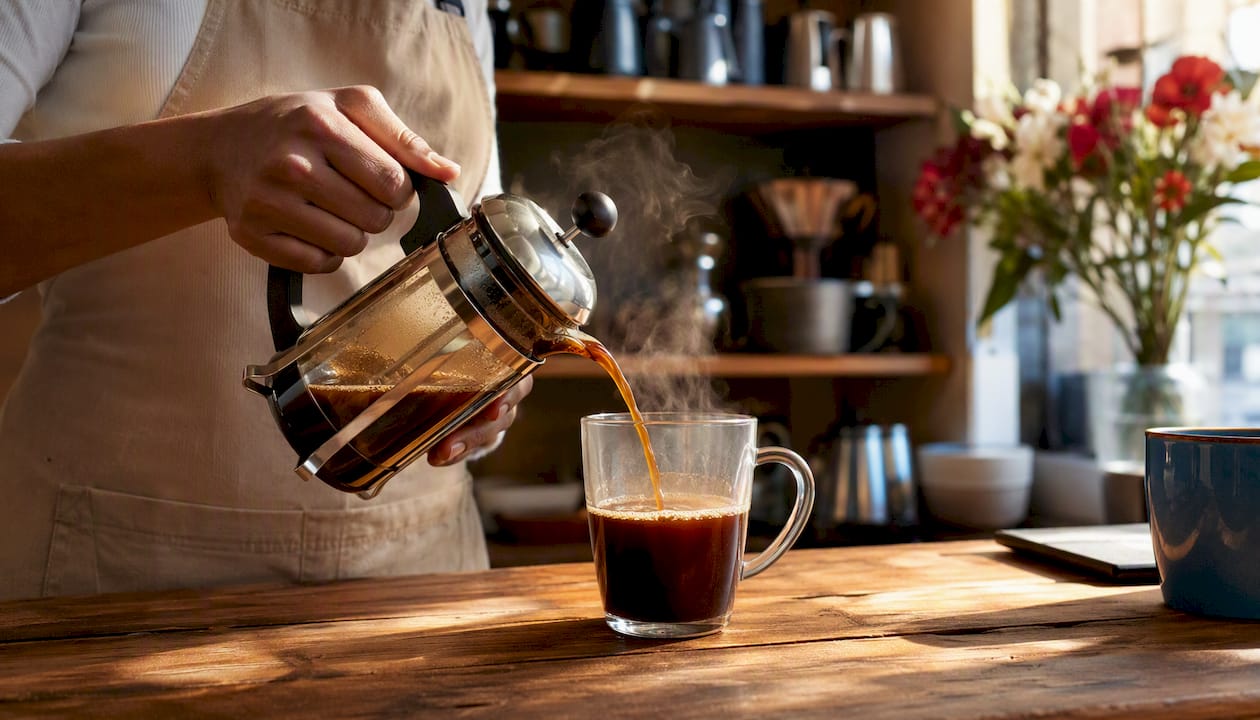
French press steeps for about 4 minutes with a coarse grind and produces a heavier, richer cup than pour-over. The Bodum Chambord is the most recognisable model in the UK, available in most kitchen shops from around £20.
Step-by-step French press recipe
- Grind: Coarse (like coarse sea salt or breadcrumbs)
- Ratio: 1:15 (e.g. 30 g coffee to 450 ml water)
- Water temperature: 93–96 °C
- Add water: Pour all the water over the grounds and give one gentle stir
- Steep: 4 minutes with the lid on (plunger up)
- Press: Push the plunger down slowly and steadily over about 20 seconds
- Pour immediately: Do not leave coffee sitting on the grounds after pressing
Pros:
- Rich, full body that no paper-filter method can replicate
- No paper filters to buy
- Simple to use, no specialist pouring technique required
- Available in large capacities (up to 1 litre) for households
Cons:
- Sediment in the cup is unavoidable with a metal filter
- Oils remain (relevant if you drink many cups daily — see the health note above)
- Cleanup requires rinsing the mesh thoroughly
Pro Tip: Pour every drop of coffee out immediately after pressing. Leaving it in contact with the grounds continues extraction and turns the cup bitter within minutes. If you are not serving it all at once, decant into a thermal carafe.
Grind quality matters more with a French press than many people expect. A blade grinder produces uneven particles that create both under-extracted (sour) and over-extracted (bitter) flavours in the same cup. A burr grinder, even an entry-level manual one, makes a noticeable difference.
Electric drip coffee makers: the low-effort everyday option
Electric drip machines work by heating water and dispersing it over a bed of grounds held in a paper or reusable filter. The brewed coffee drips into a carafe below. The appeal is obvious: press a button, walk away, return to a full pot. For households that drink two or more cups each morning, drip is hard to beat on pure convenience.
The catch is temperature. Many everyday automatic drip machines brew below 95 °C, which leads to under-extraction — a flat, slightly sour cup that tastes weak even with more coffee added. Machines that meet SCA (Specialty Coffee Association) certification standards maintain water temperature between 90–96 °C and distribute water evenly across the grounds through a proper showerhead, which makes a measurable difference to cup quality.
Buying checklist for a drip machine
- Brewing temperature: Look for 90–96 °C; SCA-certified models guarantee this
- Showerhead dispersion: Even saturation across the grounds, not a single-point pour
- Carafe type: Thermal carafe keeps coffee hot without a warming plate that scorches the brew; avoid machines where the plate is the only option
- Filter type: Paper filters (Melitta-style) give a cleaner cup; reusable mesh filters add body but require more cleaning
- Programmable timer: Useful for pre-grinding the night before
Recipe guidance: Use a 1:15 to 1:17 ratio (roughly 60 g of coffee per litre of water). Grind medium, similar to coarse sand. Descale the machine every 4–8 weeks depending on your water hardness — limescale build-up lowers brew temperature and is the most common reason a previously good machine starts producing weak coffee. Melitta’s own descaling tablets work well and are widely available in UK supermarkets.
Drip machines are the most practical choice for households, but the quality ceiling is set by the machine itself. A £35 supermarket model and a £180 SCA-certified machine both require the same effort from you — the difference is entirely in what the machine does with the water.
Moka pot and home espresso: intense, concentrated brewing at home
Moka pot (Bialetti)
A moka pot forces water upward through coffee grounds using steam pressure generated on the hob. The Bialetti Moka Express is the defining example, sold in most UK kitchen shops from around £25. The result is a strong, intensely flavoured brew that sits between filter coffee and true espresso in concentration — bold and satisfying, but without the crema that genuine espresso pressure produces.
Moka pots operate at roughly one bar of pressure, compared to the 9 bar a proper espresso machine uses. That difference matters: the lower pressure cannot emulsify the oils that form crema, and the extraction chemistry differs slightly. Think of moka pot coffee as stovetop espresso-style rather than true espresso.
Moka pot recipe:
- Fill the bottom chamber with cold water to just below the safety valve
- Fill the filter basket with medium-fine ground coffee, level (do not tamp)
- Assemble and place on medium-low heat
- Remove from heat when you hear a gurgling sound — the brew is done.
Domestic espresso machines
True espresso requires 9 bar of pressure and a shot time of 25–30 seconds. Domestic machines from brands such as Sage and De’Longhi can achieve this, but the skill and equipment investment is significantly higher than any other home method. A decent entry-level machine starts around £150–£200; a machine paired with a quality burr grinder (the non-negotiable companion) pushes the total to £300–£500 or more.
| Moka pot | Entry espresso machine | |
|---|---|---|
| Pressure | ~1 bar | ~9 bar |
| Typical yield | 60 ml | 25–35 ml per shot |
| Grind size | Medium-fine | Fine |
| Starter cost | £20–£40 | £150–£200 |
| Skill required | Low-medium | Medium-high |
Maintenance for both: Rinse the moka pot after every use and never use soap on the aluminium body — it strips the seasoning. For espresso machines, backflush the group head weekly, descale monthly, and replace the shower screen gasket annually.
Cold brew and cold drip: smooth, low-acid coffee for iced drinks
Cold brew is not iced coffee. Iced coffee is hot-brewed coffee poured over ice; cold brew is coffee steeped in cold or room-temperature water for an extended period, producing a concentrate with a fundamentally different chemical profile. Because heat is never applied, fewer of the acidic compounds that develop during hot extraction are present in the final cup.
Cold brew steeps for many hours and produces a smooth, low-acidity concentrate. Cold drip (also called Dutch coffee or slow drip) uses cold water dripped slowly through grounds over a shorter period — typically 3–8 hours — and produces a slightly brighter, more delicate result than immersion cold brew.
Cold brew recipe
- Ratio: 1:8 for concentrate (e.g. 100 g coarse-ground coffee to 800 ml cold water)
- Grind: Coarse (same as French press)
- Steep: 12–18 hours in the fridge (longer = stronger, but bitterness increases past 24 hours)
- Filter: Pour through a paper filter or fine-mesh sieve to remove grounds
- Dilute: Mix 1:1 with cold water or milk to serve; use neat as a cocktail base or over ice
Storage: Cold brew concentrate keeps in the fridge for up to two weeks in a sealed container. Do not leave it at room temperature for extended periods once brewed.
Pros:
- Very low acidity — well suited to sensitive stomachs
- Large batch means no daily brewing effort
- Concentrate is versatile (iced lattes, coffee cocktails, desserts)
Cons:
- Requires planning ahead (12–24 hours)
- Needs fridge space for steeping and storage
- Coarser grind and longer time means less origin nuance than pour-over
Cold brew is a particularly good match for medium to dark roasts, where the low-acid profile complements the chocolate and caramel notes that develop during roasting.
Other brewing methods worth exploring
A few methods sit outside the mainstream but are worth knowing about, either for the experience or because they suit specific occasions.
Siphon (vacuum pot): Water is drawn up into an upper chamber by vapour pressure, mixes with grounds, then filters back down as the heat is removed. The result is exceptionally clean and almost tea-like. It is theatrical to watch and produces a genuinely distinctive cup, but the equipment is fragile and the process takes 8–10 minutes of attention.
Turkish coffee (ibrik/cezve): Very finely ground coffee is simmered directly in water with sugar, then poured unfiltered into a small cup. The grounds settle and you drink around them. Strong, thick, and traditionally prepared — no filter, no plunger, just heat and patience.
Phin filter (Vietnamese drip): A small metal filter sits on top of a glass and drips concentrated coffee slowly over condensed milk. The result is intensely sweet and rich. Brewing takes 5–7 minutes and the kit costs almost nothing.
Percolator: Hot water cycles repeatedly through the grounds, which tends to over-extract and produce a bitter, flat cup. Largely superseded by drip machines, but still found in camping and catering contexts where simplicity matters more than nuance.
Clever Dripper: A hybrid that combines full immersion (like a French press) with a paper filter (like pour-over). You steep the grounds, then place the dripper on a cup to release the brew through the filter. It is forgiving, produces a clean cup with somebody else, and is a good entry point for anyone who finds pour-over technique fiddly.
How do you choose the right brewing method for your routine?
Work through these questions and the answer usually becomes obvious.
Ask yourself:
- Do you drink black coffee or with milk? Espresso-based milk drinks need a machine or moka pot; black coffee suits any method.
- How many cups per morning? One or two: AeroPress, V60, or French press. Three or more: drip machine.
- How much time do you have? Under 3 minutes: AeroPress. 4 minutes and happy to be present: pour-over or French press. Press a button and leave: drip.
- Do you travel or camp? AeroPress is the only serious answer.
- What is your budget? Under £40: AeroPress or French press. £40–£100: V60 with a decent kettle. £150+: entry espresso machine.
- How much maintenance will you actually do? Low: AeroPress or drip. Medium: French press, moka pot. High: espresso machine.
Rules of thumb:
- Choose pour-over when origin character and clarity matter most
- Choose French press when you want body and are happy with a little sediment
- Choose AeroPress when you want flexibility and speed without sacrificing quality
- Choose drip when you need multi-cup convenience every morning
- Choose espresso when milk drinks are the goal and you are willing to invest in technique
Pro Tip: Before buying a new brewer, upgrade your grinder. A burr grinder is the single highest-leverage change a home brewer can make — consistent particle size affects extraction more than any other variable, including the brewer itself.
What actually makes a good cup? The metrics that matter
The four variables that affect every brewing method are grind size, water temperature, coffee-to-water ratio, and contact time. Master those four and you can produce a good cup from almost any brewer.
The judging dimensions used across this guide:
- Extraction balance: Does the cup taste sweet and balanced, or sour (under-extracted) or bitter (over-extracted)?
- Brew time: How long from start to first sip, including setup?
- Repeatability: Can you produce the same result twice without specialist skill?
- Ease of cleaning: How much effort does the equipment require after each use?
- Capacity: Does the method scale to the number of cups you need?
- Cost: What does the equipment cost to buy and maintain?
The four high-leverage variables:
- Grind size: Finer grinds extract faster; coarser grinds extract slower. Wrong grind size is the most common cause of a bad cup.
- Water temperature: Specialty coffee guidance recommends 90–96 °C for most manual brews. A 30–45 second rest after boiling gets you there without a thermometer.
- Coffee-to-water ratio: Start at 1:15 and adjust by taste. More coffee is not always better — it can increase bitterness without improving flavour.
- Contact time: Too short and the cup is sour; too long and it turns bitter. Each method has a target window.
Testing at home: Weigh your coffee and water with a kitchen scale. Time your brew. Taste blind against a different ratio or temperature. Changing one variable at a time is the only way to know what actually improved the cup.
Barista-level technique tips from Nairobibarschool trainers
The gap between a decent home cup and a genuinely great one usually comes down to a handful of technique details that take minutes to learn and make an immediate difference. Nairobibarschool’s Diploma in Barista Skills covers these in depth, but here are the highest-impact points.
Extraction control
A sour cup is under-extracted: grind finer, increase water temperature, or extend contact time. A bitter cup is over-extracted: grind coarser, lower temperature slightly, or shorten contact time. Adjust one variable at a time. Most home brewers who complain about bitterness are actually grinding too fine or leaving the French press plunger down with coffee still in the vessel.
Pouring technique for pour-over
Start with the bloom pour (twice the weight of coffee in water, 30-second wait). Then add water in slow, concentric circles from the centre outward. Avoid pouring directly onto the filter paper — it bypasses the grounds and dilutes the brew unevenly. A gooseneck kettle gives you the flow control to do this consistently; a standard kettle spout makes it genuinely difficult.
Tamping and milk for home espresso
Tamp with level, even pressure — around 15–20 kg of downward force is the commonly cited target in barista training, though consistency matters more than hitting an exact number. An uneven tamp channels water through the path of least resistance and produces a weak, uneven shot. For milk, heat to 60–65 °C and introduce air in the first few seconds of steaming to create microfoam rather than large bubbles.
Equipment priorities:
- Burr grinder first (manual options from Hario or Timemore start around £40–£60)
- Gooseneck kettle second for pour-over users
- Kitchen scale third (any accurate 0.1 g scale works)
- Thermometer optional if you use the 30-second rest method
Pro Tip: Dose by weight, not by scoop. A scale removes that variable entirely and makes every cup repeatable. Check the barista training tools guide for equipment recommendations at every budget.
An editorial note from dennis
The most common mistake enthusiasts make is buying a more expensive brewer when the problem is actually the grinder or the ratio. A £15 V60 with a decent burr grinder and a kitchen scale will outperform a £200 machine paired with pre-ground supermarket coffee, every single time. The method matters less than the variables you control within it.
What I find genuinely underappreciated is how much cold brew changes the experience for people who think they dislike coffee’s bitterness. The long steep at low temperature produces a cup that tastes almost nothing like hot-brewed coffee from the same beans — sweeter, smoother, and far more approachable. If you have written off coffee because of bitterness, try a 16-hour cold brew before you give up.
Nairobibarschool’s practical barista training is built on exactly this kind of variable-by-variable thinking. The Certificate in Barista Skills gives you the hands-on reps to internalise these adjustments quickly, rather than spending months guessing at home.
Sources
- Coffee preparation
- Brewing – NCA – About Coffee
- Coffee Brewing Methods: 12 Ways to Make a Better Cup | Pulled Journal
- The Complete Home Coffee Brewing Guide | Roast Coffee Company
- Pour‑Over vs French Press – Which Brewing Method Delivers Better Coffee? | Home Brew Expert